So How To Create And Run First TestNG-WebDriver Test Case In Eclipse ?
Step 1 : Create New Project And Package
Step 2 : Add TestNG Library
For adding TestNG library,- Go to your project's Properties -> Java Build Path -> Libraries Tab.
- Click on Add Library button -> Select TestNG from Add Library popup and then click on Next and Finish buttons.

It will add TestNg library in your project as shown in bellow image. Now click on OK button to close that window.

Step 3 : Create TestNG Class
To add TestNg class
- Right click on package "TestNGOnePack" -> New -> Other. It will open New wizard window as bellow.

- Select TestNg from New wizard window and click on Next button.
- On next screen, add class name = ClassOne
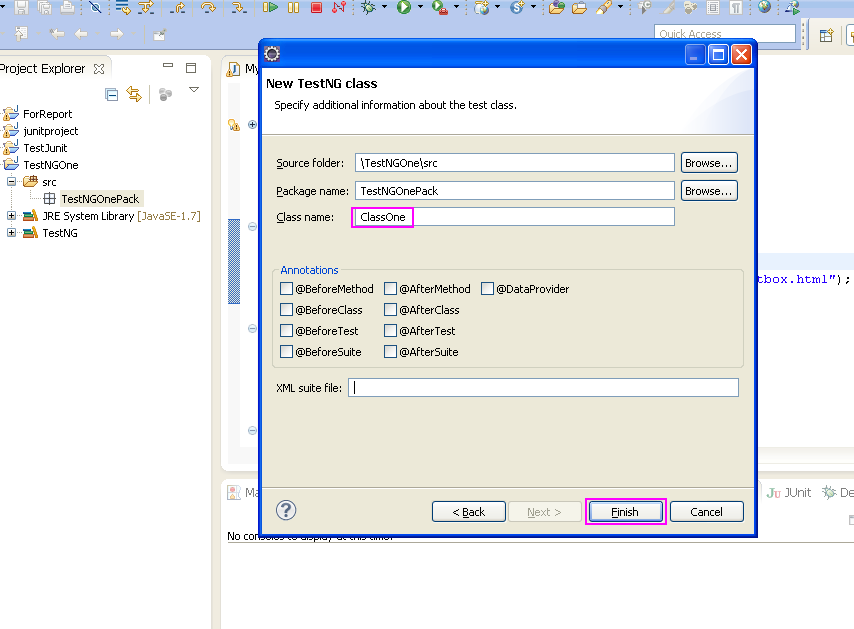
- It will add new class (ClassOne) under package as shown in bellow given image.

Step 4 : Add webdriver's external jar file in your project.
To Run webdriver test, you need to add webdriver's jar files as external jar file in your project.
(Note : Do not add junit jar file as external jar file. Now its not required in TestNG framework).
This is it. Now you are ready to write your webdriver test script inside your class.
Write your own test script or add bellow given script in your class file.
package TestNGOnePack;
import org.openqa.selenium.WebDriver;
import org.openqa.selenium.firefox.FirefoxDriver;
import org.testng.annotations.AfterMethod;
import org.testng.annotations.BeforeMethod;
import org.testng.annotations.Test;

public class ClassOne {

 WebDriver driver = new FirefoxDriver();

 //@BeforeMethod defines this method has to run before every @Test methods
 @BeforeMethod
 public void openbrowser() {
  driver.manage().window().maximize();
  driver.get("http://only-testing-blog.blogspot.in/2013/11/new-test.html");
 }

 //@AfterMethod defines this method has to run after every @Test methods
 @AfterMethod
 public void closebrowser() {
  System.out.print("\nBrowser close");
  driver.quit();
 }

 @Test
 public void testmethodone() {
   String title = driver.getTitle();
   System.out.print("Current page title is : "+title);
   System.out.print("\n'TestNGOne -> TestNGOnePack -> ClassOne -> testmethodone' has been executed successfully");
 }
}
Step 6 : Run Webdriver test script with TestNG
Go to Run -> Run As -> And Click on TestNg Test as shown in bellow given image.
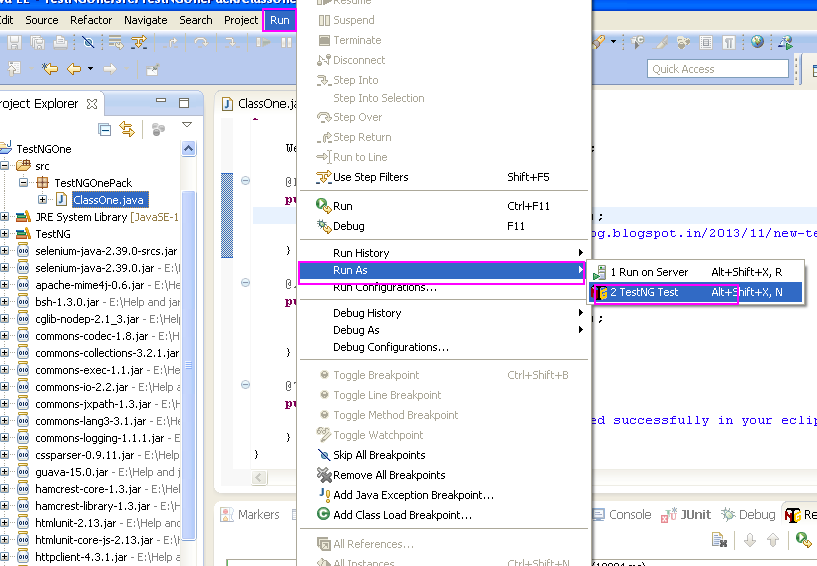
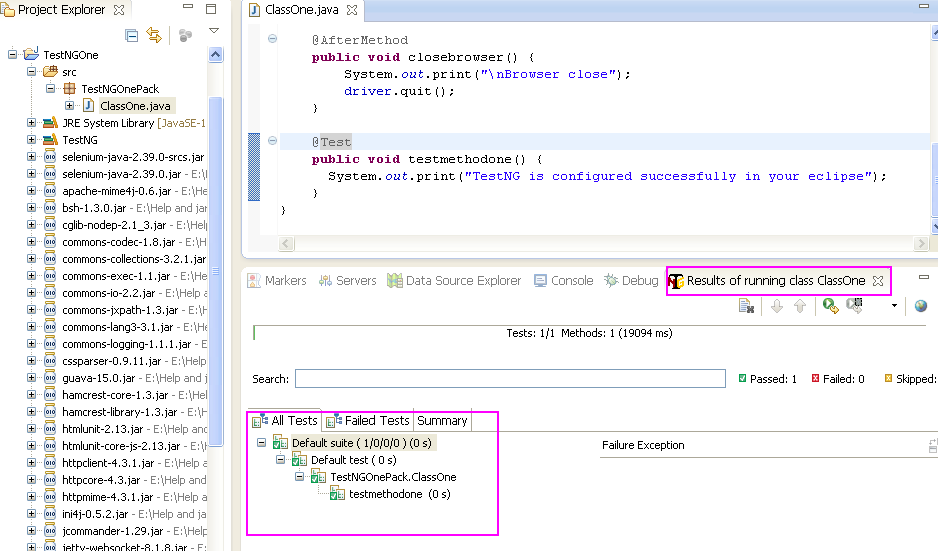
It will run your webdriver test with TestNG. When execution completed, You will see result as shown in bellow given image.
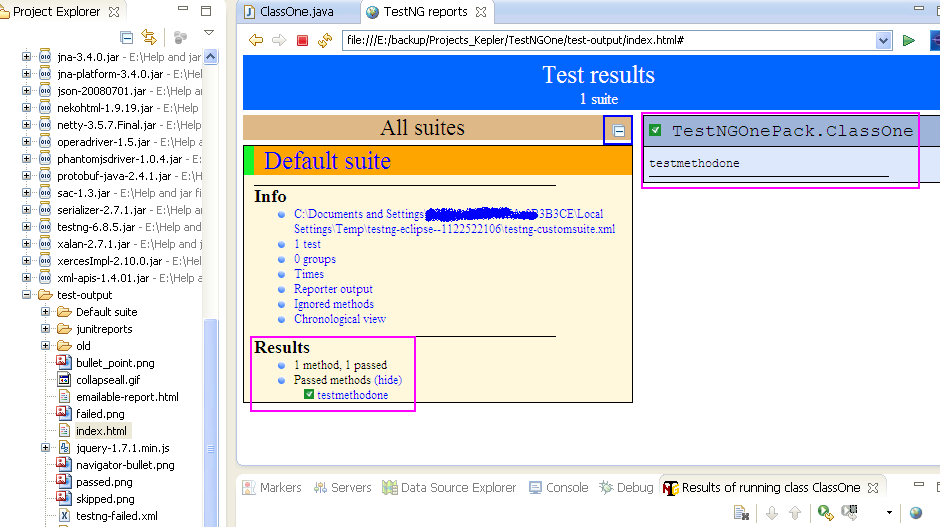
Step 7 : View test execution HTML report generated by TestNG
To view test execution report,
- Right click on "TestNGOne" project folder in eclipse and select Refresh.
- Folder with name = "test-output" will be created under your project folder as shown in bellow given Image.

- Explore that folder and open it with web Browser as shown in above image. It will open report in eclipse as shown in bellow given image.